Thinset Coverage for 12×24 Tile: Notch Sizes, Mortar Beds & Coverage Rates
Master engineering guide to calculating thinset mortar for 12×24 porcelain tile. Trowel notch sizing, directional combing physics, back-buttering rules, and ANSI A108.5 coverage standards.
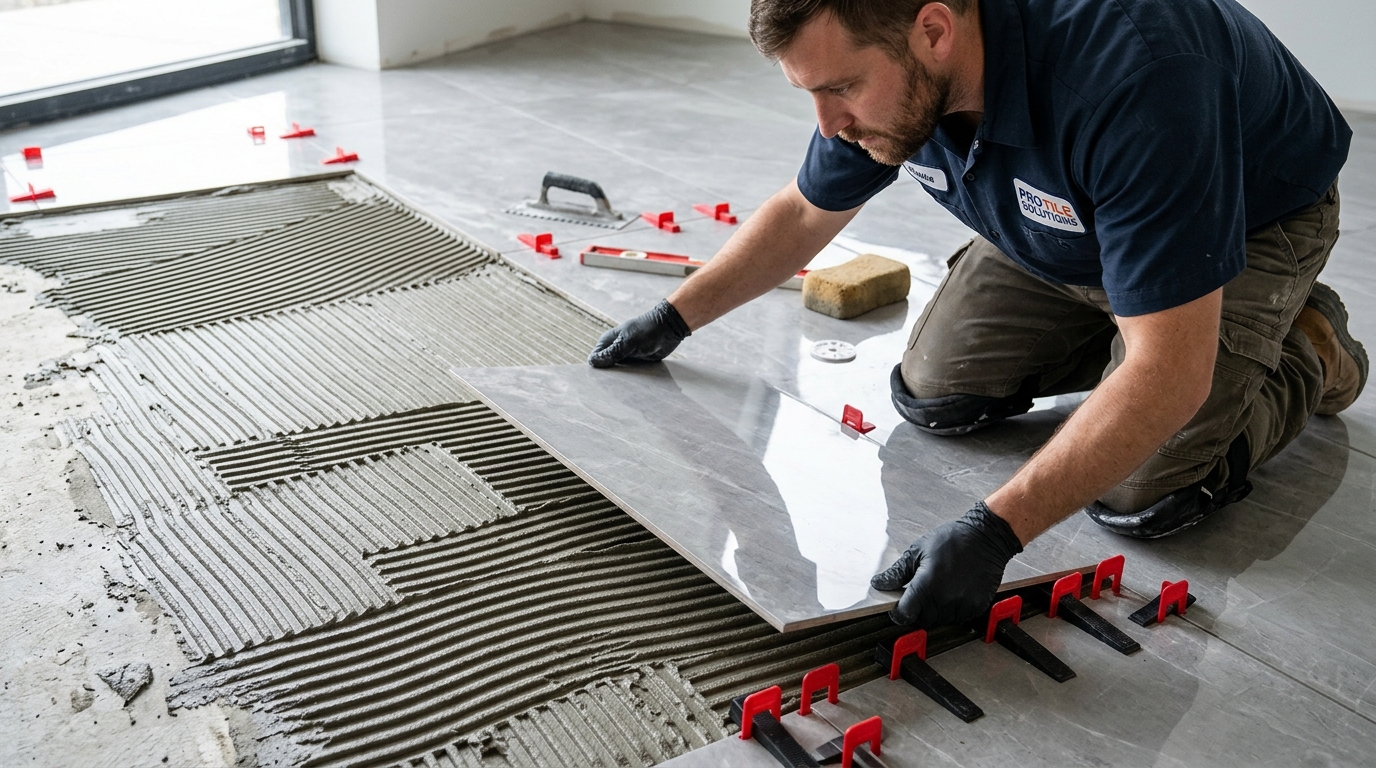
Thinset Coverage for 12×24 Tile: Complete Technical & Coverage Guide
Installing 12×24 porcelain tile has become the undisputed standard for modern residential bathrooms, open-concept kitchens, and commercial floors. However, transition from traditional 12×12 ceramics to 12×24 large-format tile (LFT) is the single most common reason DIYers and contractors run short on thinset mortar on the jobsite.
A 12×24 tile requires more than double the mortar volume of a standard 12×12 tile. If you estimate coverage using the generic numbers printed on the back of a standard mortar bag, you will inevitably run out of material halfway through your installation.
This guide provides exact coverage calculations, trowel geometry comparisons, directional combing rules, and jobsite failure analysis according to Tile Council of North America (TCNA) standards.
Quick Calculation Summary: What to Expect per 50 lb Bag
| Trowel Notch Size & Profile | Average Yield per 50 lb Bag | Mortar Bed Thickness (Compressed) | Recommended Application |
|---|---|---|---|
| 1/2” × 1/2” Square Notch | 35 – 42 sq ft | ~1/4” (6 mm) | Standard 12×24 floor on flat subfloor |
| 1/2” × 1/2” U-Notch | 40 – 48 sq ft | ~3/16” (5 mm) | 12×24 wall installations & flatter floors |
| Euro-Slant / Slant Notch (1/2”) | 42 – 50 sq ft | ~1/4” (6 mm) | Premium rapid ridge collapse |
| 3/4” Half-Round Notch | 28 – 35 sq ft | ~5/16” (8 mm) | Heavy cupped tile or slightly uneven slab |
| Back-Butter Skim Coat (Flat Side) | 120 – 160 sq ft | ~1/32” to 1/16” (1 mm) | Mandatory adhesion bond on porcelain back |
The Golden Rule for 12×24 Tile: Plan for 35 to 40 square feet per 50 lb bag of standard medium-bed mortar, which comfortably accounts for mandatory back-buttering, trowel angle variations, and a 10% cutting and waste allowance.
Project Bag Estimation Matrix for 12×24 Tile
Below is a field-tested breakdown of mortar quantities required for typical residential and commercial project footprints when using a 1/2” × 1/2” square notch trowel with back-buttering and a 10% waste buffer:
| Net Tile Area | Effective Area (+10% Waste) | Standard 50 lb Bags (e.g. MAPEI Ultraflex LFT) | Lightweight 25 lb Bags (e.g. MAPEI Ultralite LFT) | Estimated Total Mortar Weight |
|---|---|---|---|---|
| 50 sq ft (Half Bath / Powder) | 55 sq ft | 2 Bags | 2 Bags | 100 lbs (or 50 lbs light) |
| 100 sq ft (Standard Bathroom) | 110 sq ft | 3 to 4 Bags | 3 to 4 Bags | 150 – 200 lbs |
| 150 sq ft (Master Bath + Shower) | 165 sq ft | 5 Bags | 5 Bags | 250 lbs |
| 200 sq ft (Large Kitchen Floor) | 220 sq ft | 6 to 7 Bags | 6 to 7 Bags | 300 – 350 lbs |
| 300 sq ft (Kitchen + Dining) | 330 sq ft | 9 to 10 Bags | 9 to 10 Bags | 450 – 500 lbs |
| 500 sq ft (Main Living Area) | 550 sq ft | 15 to 16 Bags | 15 to 16 Bags | 750 – 800 lbs |
| 1,000 sq ft (Commercial Showroom) | 1,100 sq ft | 31 to 33 Bags | 31 to 33 Bags | 1,550 – 1,650 lbs |
Need customized dimensions or custom waste factors? Use our dedicated 12×24 Thinset Calculator to compute exact bag counts, costs, water ratios, and leveling clip quantities.
Why 12×24 Tile Requires Double the Mortar
Under TCNA Handbook guidelines, any tile having at least one edge longer than 15 inches is officially categorized as a Large and Heavy Tile (LFT).
A 12×24 tile has 288 square inches of surface area—exactly double that of a 12×12 tile. However, the mortar consumption increase is not merely linear; it is geometric for three fundamental reasons:
┌─────────────────────────────────────────────────────────────────────────┐
│              WHY 12×24 TILES DEMAND A DEEPER MORTAR BED                 │
├─────────────────────────────────────────────────────────────────────────┤
│ 1. Rigidity: Large slabs cannot bend to follow subfloor micro-dips      │
│ 2. Kiln Warpage: Inherent manufacturing crown curvature (cupping)       │
│ 3. Impact Voids: 1/4" trowels collapse to an inadequate 3/32" bed       │
└─────────────────────────────────────────────────────────────────────────┘
1. Inability to Conform to Subfloor Contours
A small 3×6 subway tile or 12×12 ceramic easily rides over a minor 1/16-inch hump or valley in a concrete slab. A 24-inch porcelain slab, however, acts as a rigid bridge. If the mortar bed is too shallow (such as from a 1/4” trowel), the center or ends of the tile will remain suspended in mid-air over subfloor dips, creating massive hollow voids that crack the first time a heavy load or point impact occurs.
2. Inherent Tile Crown (Warpage)
During kiln firing, ceramic and porcelain tiles experience differential shrinkage. Almost all 24-inch porcelain tiles possess an inherent crown: the center is slightly higher than the ends. To bed both the high center and the low corners fully into continuous mortar without hollow pockets beneath, you must provide a thicker, malleable mortar cushion—at least 1/8” to 1/4” after collapse.
3. Medium-Bed (LFT) Mortar Chemistry
You cannot simply pile standard thinset higher. Standard thinset shrinks as water evaporates, which pulls the tile down unpredictably and produces severe lippage (uneven edges between adjacent tiles).
You must use a mortar meeting ANSI A118.4HT or ANSI A118.15HT (Large and Heavy Tile / Medium-Bed Mortar). These mortars contain coarse, graded sands and anti-slump thixotropic polymers that hold heavy tiles in place without settling or sinking into the mortar bed.
Directional Troweling Physics: The Straight-Ridge Rule
How you comb the thinset onto the floor is just as important as the trowel size. The Tile Council of North America field standard strictly dictates: Comb mortar in straight, parallel lines in the direction of the shortest tile edge.

Why Short-Side Combing is Non-Negotiable
For a 12×24 tile, you must comb your ridges parallel to the 12-inch side, never the 24-inch side:
- Short Travel Distance for Exhausting Air: When the tile is set and bedded with a back-and-forth motion perpendicular to the ridges, trapped air must only travel a maximum of 6 inches in either direction to escape out the open perimeter.
- Long-Side Combing Traps Air: If combed along the 24-inch length, air must travel 12 inches to escape. Trapped air pockets become pressurized, preventing the tile from sinking flat into the ridges.
- The Fatal Swirl Error: Swirling the trowel in circular arcs (a common habit among old-school linoleum and small-tile setters) creates closed suction rings. When the tile is dropped, the edges seal first, trapping air in the swirled centers. This creates 40% to 60% hollow voids under the tile, virtually guaranteeing point-load cracking.
The Mandatory Art of Back-Buttering
Even with a 1/2” square notch trowel, setting a 12×24 porcelain tile directly onto combed ridges without back-buttering will rarely achieve the mandatory ANSI 80% to 95% continuous contact.
                    STEP-BY-STEP BACK-BUTTERING TECHNIQUE

   1. Clean Tile Back       2. Flat-Side Burn         3. Drop & Bed
   ┌────────────────┐      ┌────────────────┐      ┌────────────────┐
   │ (Wipe Dust)    │  ──► │ (1/16" Skim)   │  ──► │ (Perpendicular│
   │                │      │ ══════════════ │      │  Slide 1/8")   │
   └────────────────┘      └────────────────┘      └────────────────┘
How to Properly Back-Butter:
- Wipe the Tile Back: Porcelain tiles often have a white kiln-release powder on their reverse side. Wipe the back with a damp sponge to remove dust.
- Burn in a Flat Bond Coat: Using the flat, unnotched edge of your steel trowel, vigorously scrape a thin (1/32” to 1/16”) layer of thinset into the back texture of the tile.
- Keying the Pores: This forces the polymer cement deep into the microscopic pores of the porcelain, ensuring 100% molecular contact.
- Set While Both Surfaces are Wet: Immediately bed the back-buttered tile into the freshly combed floor ridges. As the combed ridges collapse under pressure, they weld instantly to the wet back-buttered film.
ANSI A108.5 Coverage Standards: 80% vs. 95%
Under ANSI A108.5 specifications, you must achieve:
- Minimum 80% continuous mortar contact beneath tiles in all dry interior areas (bedrooms, living rooms, hallways).
- Minimum 95% continuous mortar contact in all wet areas (showers, tub surrounds, steam rooms, water features) and all exterior installations.
- No voids beneath tile corners or edges: All four corners of every 12×24 tile must have 100% solid mortar support within 2 inches of the perimeter.
The Jobsite 1-in-5 Pull-Up Test:
To verify your coverage on the jobsite:
- Every 5 to 10 tiles, immediately lift a freshly embedded 12×24 tile straight up off the mortar bed.
- Inspect the underside of the tile and the floor.
- You should see completely collapsed ridges with no distinct line patterns remaining. The mortar bed should be a solid, continuous sheet of uniform thickness.
- If you see distinct uncollapsed ridges or dry bald spots, your trowel notch is too small, your mortar is mixed too dry, or your back-buttering was inadequate. Clean the tile, apply fresh mortar, and adjust your technique immediately.
Conquering Lippage: The 33% Offset Rule & Leveling Clips
Lippage is the condition where one edge of a tile is higher than the adjacent tile, creating an unsightly ledge and tripping hazard.
┌─────────────────────────────────────────────────────────────────────────┐
│                    RUNNING BOND VS 33% OFFSET PATTERN                   │
├─────────────────────────────────────────────────────────────────────────┤
│ ✗ 50% BRICK RUNNING BOND:                                               │
│   ┌───────────────────┬───────────────────┐                             │
│   │       TILE 1      │       TILE 2      │                             │
│   └─────────┬─────────┴─────────┬─────────┘                             │
│             │   MAX LIPPAGE!    │ ◄── Highest center meets lowest end!  │
│       ┌─────┴───────────┬───────┴─────┐                                 │
│       │      TILE 3     │    TILE 4   │                                 │
│       └─────────────────┴─────────────┘                                 │
│                                                                         │
│ ✓ TCNA 33% MAXIMUM OFFSET:                                              │
│   ┌───────────────────┬───────────────────┐                             │
│   │       TILE 1      │       TILE 2      │                             │
│   └─────┬─────────────┴─────┬─────────────┘                             │
│         │     SAFE OFFSET   │ ◄── Curvature minimized by 60%            │
│     ┌───┴───────────────┬───┴───────────┐                               │
│     │       TILE 3      │     TILE 4    │                               │
│     └───────────────────┴───────────────┘                               │
└─────────────────────────────────────────────────────────────────────────┘
1. Why 50% Brick Bond Fails on 12×24 Tiles
In a standard 50% running bond (staggered half-and-half), the highest point (the center crown) of Tile 3 sits directly adjacent to the lowest point (the outer corner) of Tile 1 and Tile 2. Because 24-inch tiles have natural kiln curvature, this layout creates maximum lippage that even the thickest mortar bed cannot eliminate.
2. The TCNA 33% Offset Solution
The TCNA mandates that running bond installations of tiles with an edge longer than 15 inches must not exceed a 33% (1/3) offset (approximately 8 inches on a 24-inch tile). This shifts the apex of the crown away from the corner, reducing optical and physical lippage by over 60%.
3. Mechanical Tile Leveling Systems
Using a mechanical leveling system (interlocking clips and wedges or spin-caps) is highly recommended for 12×24 tiles. However, leveling clips do not substitute for thinset mortar. The mortar bed must be completely full beneath the tile; clips merely hold the surface plane perfectly flush while the medium-bed mortar cures without sagging.
5 Costly Pitfalls to Avoid on 12×24 Installations
- Using Standard Thinset Instead of LFT/Medium-Bed: Standard thinset shrinks and slumps under the 5 to 7 lb weight of a 12×24 tile, causing severe post-cure lippage.
- Troweling Beyond Your Arm’s Reach: Combing out 40 square feet of mortar at once allows the surface of the ridges to “skin over” within 10 to 15 minutes. Once skinned over, mortar will not bond to tile.
- Ignoring Subfloor Flatness: ANSI requires the subfloor to be flat within 1/8 inch in 10 feet for large-format tiles. If your subfloor has severe dips, pour a cementitious self-leveling underlayment before setting tile.
- Walking on Tiles Within 24 Hours: Stepping on an uncured 12×24 tile compresses the medium-bed mortar unevenly, permanently breaking the polymer bond and creating lippage.
- Omitting Perimeter Soft Joints (TCNA EJ171): Porcelain expands with thermal changes. Never pack rigid cement grout against baseboards, tubs, or walls. Leave a 1/4-inch expansion gap and fill with color-matched 100% silicone sealant.
Frequently Asked Questions
Can I use a 1/4” × 3/8” trowel for 12×24 tile?
Only if your subfloor has been freshly leveled to mirror-flat perfection with self-leveling compound and the tile has virtually zero crown. On typical jobsite subfloors, a 1/4” × 3/8” trowel yields only ~65% to 75% coverage on 12×24 porcelain, falling well short of the mandatory ANSI 80% to 95% threshold. A 1/2” × 1/2” trowel is significantly safer.
How much water should I mix per 50 lb bag of LFT mortar?
Most 50 lb bags of LFT medium-bed mortar require between 5.5 and 6.5 quarts (5.2 to 6.2 liters) of clean, cool water. Follow the exact manufacturer TDS instructions. Check out our Thinset Water Ratio Calculator for exact batch mixing measurements.
Is back-buttering truly necessary if I use a 1/2” trowel?
Yes. Field testing consistently demonstrates that dry-laying 12×24 porcelain onto 1/2” ridges without back-buttering leaves 20% to 35% of the porcelain back dry and untouched. Back-buttering wets the back surface, eliminates kiln-dust interference, and ensures 95%+ solid contact.
How many bags do I need for a 100 sq ft bathroom floor?
For 100 square feet of 12×24 tile, you need 3 to 4 bags (50 lbs each) of LFT mortar. With 10% waste, your effective area is 110 sq ft. At 35–40 sq ft per bag, 3 bags provide 105–120 sq ft of coverage. Having a 4th bag on hand prevents halting your project mid-install.
What grout joint width is recommended for 12×24 tile?
ANSI A108.02 recommends a minimum joint width of 3 times the actual tile dimensional variance, typically 1/8 inch to 3/16 inch for rectified porcelain tile. Grout joints smaller than 1/8” (such as 1/16”) on 12×24 tile make lippage control nearly impossible.
How long does thinset take to dry under 12×24 tile before grouting?
Because 12×24 porcelain is non-porous, moisture escapes slowly through the grout joints. Wait at least 24 hours before walking on or grouting the floor. In cold or humid conditions, or over uncoupling membranes, allow 48 hours before grouting.
Can I install 12×24 tile on shower walls with standard mortar?
No. Standard mortar will allow heavy 12×24 tiles to slide down the wall. Use an ANSI A118.4HT or A118.15HT non-sag mortar. Mix slightly on the stiffer side of the manufacturer’s recommended water range for wall applications.
What is the difference between 50 lb and 25 lb lightweight LFT mortar?
Lightweight mortars (like MAPEI Ultralite or Custom ProLite) substitute heavy sand aggregates with recycled hollow glass beads or lightweight perlite. A 25 lb bag of lightweight mortar yields the exact same square footage as a 50 lb standard bag, but reduces lifting fatigue by 50% and provides superior non-sag performance on walls.
Interactive Tools to Calculate Your Project
- 12×24 Thinset Calculator – Calculate exact bags, clips, compressed thickness, and costs for 12×24 tiles.
- Large Format Tile (LFT) Calculator – Sizing and coverage specs for tiles up to 24×48 and 36×72.
- Thinset Trowel Size Calculator – Match notch dimensions to tile sizes and substrate types.
- Thinset Cost Calculator – Compare material expenses across standard vs lightweight vs rapid-setting mortars.
Ready to Calculate Thinset for Your Project?
Use our instant, trowel-aware calculator with manufacturer-specific coverage data.